Have you ever watched the impressive Open Obedience competition at a dog show?
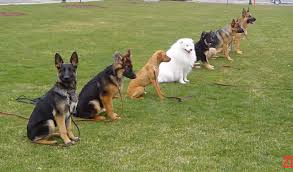 If so, you may have been amazed by the long sits and downs, where all of the dogs do a group sit/stay for three minutes with the owners out of sight behind a barrier or in another room. They also demonstrate a down/stay for a full five minutes with the owners nowhere to be seen.
If you struggle to make your dog stay in the car when you open the door, you may find those show ring achievements downright awe inspiring. It is awesome to see a dozen or more dogs sitting shoulder to shoulder amidst all the distractions of a dog show, stoically awaiting their owner’s return and it takes a serious commitment to training to accomplish this feat.
Fortunately, teaching your dog to stop leaping out of car doors, running out the front door when visitors open it, or getting too far ahead of you on a off leash trail, are attainable for any dog owner who is willing to make a commitment of a few minutes a day to the training project.
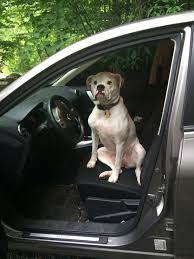 However, in each of the latter situations, where many people might ask their dogs to stay, I use the cue “wait” saving the ” stay” cue for different situations. To my dogs “wait” means pause, and “stay” means don’t move from the position your in until I tell you it’s okay to get up. If I am getting out of my car, I use the “wait” cue, since what I really mean is “Don’t jump out of the car”, not “Freeze” and don’t move until I return”.
If I use the word “stay” in this scenario, I damage my dog’s understanding of the stay cue and behavior. Dogs can only learn one meaning for a particular cue. Humans can understand that the word “down” might mean lie down on the ground, get off the sofa, don’t jump on me, or go down the stairs. Dog’s can’t make those distinctions.
Most owners actually mean “Wait” when they say “Stay”.
Think about it. When you leave your dog home alone when you go to work, do you say “stay” as you walk out the door? You don’t really want him to sit frozen by the door all day. You are really asking him to pause for a moment or two , not “sit right there till I return”.
You can of course, continue to use “Stay” to mean “Wait” and use a different word like “Freeze” for his formal stay. Whichever cue you choose, just remember to be consistent and use each cue for it’s specific intended behavior. Otherwise, you risk muddying both commands in the dog’s mind.
Teaching the “Wait”
I have my dogs wait every time they go in or out of a door to the outside. This gives you a great opportunity to remind them to defer to you at least a half dozen times per day, therefore reinforcing their good manners. It’s also a great safety reminder. It stops them from bolting out the door and running away.
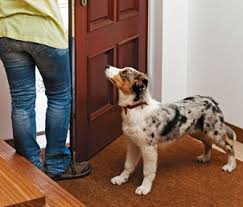 One of the easiest ways to teach the wait behavior is by using a door, preferably a door that your dog wants to go through, and one that opens to a safe, enclosed yard, garage, or other room. If this is not a possibility, you can set up two cones about 3 feet apart and pretend that is a doorway. Most dogs are eager to go outside. It usually means something fun, a romp in the yard, a walk with the owner, or a ride in the car. You can use this to your advantage by teaching your dog that it’s calm behavior-sitting nicely at the door-not pushy behavior, that gets the door open.
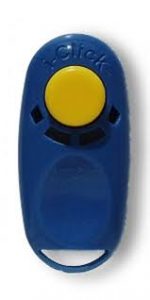 Put your dog on a leash, stash a healthy supply of high quality treats in your pocket or bait bag, and have your reward marker handy, such a “click” from the clicker or the word “yes”. Walk up to the door and ask your dog to sit. Click and treat when he sits. Move your hand halfway towards the doorknob. If he remains sitting, click and treat, and tell him he’s a good boy.
If, however, he gets up when you move your hand halfway to the door, say “Oops” or “Uh-Oh”, and have him sit again, and reduce the challenge. Move your hand four inches toward the doorknob.
If he’s still sitting, click and treat. If he gets up when you move, try moving just two inches. When you find the increment of motion that doesn’t cause him to get up, work at that distance for several repetitions, clicking and treating each time. Then try moving your hand a little farther. Do several repetitions at each increment until you can reach all the way to the doorknob without your dog getting to his feet. Don’t forget to praise in addition to the clicks and treats.
Don’t be tempted to jump too far ahead, even if your dog is holding his sit, you never know when you”ll hit upon the part of the door opening process that will trigger a “Oh Boy! I get to rush out response”.
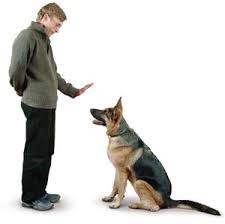 Continue the incremental approach. Jiggle the knob. Click and treat for sitting. If he gets up, say “Oops” have him sit and repeat the step, but do a smaller jiggle. When you find the level of knob jiggle where your dog can succeed, (where he stays sitting), do several repetitions of that, clicking and treating for each repetition.
Next, you get to open the door-but only a crack. Click and treat him for staying in position. If he gets up say, “Oops” close the door and try again, with a smaller crack this time.
By closing the door when he makes a mistake and gets up, you are using negative punishment-making the good thing go away. The more eager he is to go out, the quicker he will realize that the way to get the door open is to stay sitting. Once he has learned the wait you can fade the use of the click and treat. Since what he really wants is to go through the door, you can sometimes give him a “life reward” by telling him to go out.
Some dogs will “get it” in just one session. Others will need to practice over a period of several days or more, depending on their energy level and attention span-and yours! Anytime you feel you or your dog getting frustrated in a training session, take a break after doing one easy, fun behavior that you both like so you end the session on a happy note.
Adding the Cue
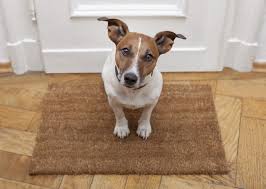 In a positive training program, you add the verbal cue for a behavior only after you know the dog will do the behavior, not before. This is because you want him to associate the word with the right response, not the wrong one. Once your dog will remain sitting as you open the door, you can then add the verbal “wait” cue. In essence, you are telling him that the behavior he is now doing is called “wait”.
Other Applications for Wait
When your dog understands wait in one situation, you can then generalize it-that is, extend it to other situations. Practice in the car, so he also understands that an open car door is not an invitation to jump out. You will be amazed at how nice it is to have a moment or two to pocket your keys, or even tie your shoes before your dog jumps out of the car.
You”ll also appreciate being able to use wait to ask your dog to pause if he is wandering too far ahead of you when you are on a off leash outing, or about to follow the wrong person out the gate of the dog park.
How “Stay” is Different
I teach my dogs the formal stay behavior for those instances when I absolutely need them to remain frozen in their places.
For example, when I walk down the driveway in the morning to get my newspaper, my dog’s accompany me, but only to a point near the end of the driveway. I don’t want them going down to the main road, so I tell them “down” and then “stay”. For their own safety, they must remain where they are and not follow me across the road.
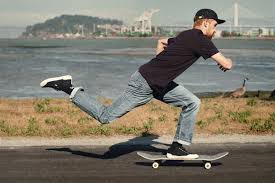 Another useful application of stay is when you are with your dog off leash and you see something approaching that you absolutely do not want your dog to chase or go near. Say you are washing your car in the driveway, and your dog is lying on your front porch when you see a boy on a skateboard coming up the sidewalk. Having a dog that will stay reliably on a cue in this situation is a real blessing.
 You can also utilize stay when a delivery person comes to the door, you can sign the forms and accept the package without having to worry about your dog slipping out or scaring the delivery person.
Stay is a much more challenging exercise than wait. It takes more focus and concentration for both your and your dog. When teaching stay, you have a greater responsibility; once you tell your dog to stay, you can’t forget and go off to start dinner or work on the car.
Consider This
Until the advent of positive dog training, stay was taught by punishing the dog, sometimes severely, for moving out of position. While many dogs did learn reliable stays by this method, they also often learned to associate the return of their owners with fear and pain. Fortunately, there are several ways to teach a positive stay without the use of force and pain.
Before you begin, it’s important to recognize that Stay has three elements of difficulty: duration, distraction and distance. Duration is the length of time the dog remains in place, distraction is the reliability of the dog’s stay in the presence of distractions, and distance is the distance you can move away from the dog.
It is critically important to work on the length of time and distractions before you work on distance. If your dog won’t do a reliable stay with distractions when you are standing in front of him, it is wholly unreasonable to expect him to do it when you are across the room.
The most common mistake people make in teaching stay is advancing too quickly. If you ask your dog for too much, he’s likely to make a mistake, and you may be sorely tempted to correct him for breaking the stay.
Remember: You want him to succeed so you can reward him for doing the right thing. You can use negative punishment here if necessary (dog’s behavior makes a good thing go away) , but it’s more effective to create opportunities to click and treat.
 Positive Stays
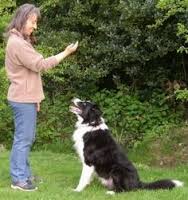
Start by asking your dog to sit. Tell him he’s a good dog, then hold up a treat. After one second, feed him the treat, calmly so he doesn’t jump up, then use a release word and encourage him to get up. You can praise him for getting up, but don’t click the release, since it’s the stay behavior you want to reinforce and reward.
When he is staying for several seconds at a time you can add the verbal stay cue in a pleasant tone of voice while he is staying. Owners tend to want to say “Stay” harshly, as a order. Remember that you aren’t trying to intimidate your dog into staying, you are using the word as a behavioral cue.
 Cue for Release
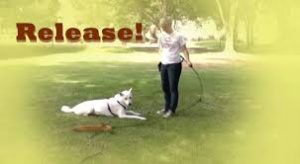
The release word is a cue that means “get up now”, the stay is over. Many people use the word okay-the only problem is that it’s a word used frequently in conversation. I do use okay as my release word, which means I have to be careful when I’m around my dogs. If my dogs are on a down-stay at the beach and I turn to someone and say, “Okay, are you ready for lunch”?…whoops, there goes the dogs!
There are a variety of other cues used for the release, including “All done”, “Free”, “Release”. One of the instructors at the kennel club uses the word”chocolate” as her release cue. Use any phrase or word you want, your words mean nothing to your dog until you give them meaning.
 Gradually Increase Difficulty
When your dog is staying for one second in the sit/stay, extend the time to two seconds. Then increase the stay to four seconds, then seven. Then ten. If your not good at estimating time by counting in your head, you can use a stopwatch or have someone else count for you. Don’t use a timer, your dog will start releasing himself when he hears the ding. When your dog is staying up to ten seconds, start varying the time-some shorter, some longer, so he doesn’t start trying to guess when the release is coming.
As the stay gets longer you can click and reward during the stay, then remind him not to move with another verbal “stay” cue, since he may think the click ends the stay. Reward with treats several times during the stay, then release him before he decides to get up on his own. Remember, you want him to succeed. Consecutive successes build on themselves exponentially.
If your dog does get up before you release him, whisk the treat behind your back. This is the negative punishment part. His behavior, (getting up), makes the good thing (treat) go away. I say the word “NO”, then I bring him back to the exact spot that he broke his stay, then I will repeat the command, “Sit”. He doesn’t get the treat until he begins staying again, for at least a second at first, then longer as he gets better at stay. (This is the positive reinforcement part:his behavior (sitting and staying) makes a good thing (the treat) happen.
As the stay gets longer, you can start fading the treat, this way he never knows if a treat is coming or not. Reward with a treat every other repetition, and fade from there. The process for down/stay is exactly the same, except your dog is laying down instead of sitting.
Adding Distractions
Once your dog will stay for 10-20 seconds you are ready to add small distractions. Ask him to stay and take one small step to the side, then step back next to him. Click, reward and release. Do another stay and take a hop on one foot. Click, reward, release.
Gradually build the distractions until your dog will stay as you hop up and down without stopping, do jumping jacks, clap your hands, sit or lie down on the ground in front of him, spin in circles, bounce a ball, throw a toy up into the air-or whatever other creative distractions you can invent. These techniques are known as “proofing”. Proofing is a technique used during training to change the appearance or configuration of any part of a skill or exercise in an attempt to test the dog’s understanding and knowledge, and to increase his level of confidence.
Gradually, is the keyword here. You want your dog to succeed. If you go directly from the hop to the skateboard, you’ll probably lose him. Gradually is also subjective, depending on your dog. Some dogs will achieve a solid stay at a distance, with distractions, within a few weeks, others will take longer.
Adding Distance
When your dog is doing 20 to 30 second stays with distractions you are ready to start working on distance. Now you should lower your expectations for the other two elements:shorten the time and remove the distractions.
Ask your dog to stay and take one step away. Click, return, reward, release. Gradually increase the distance, remembering that you want to add distance slowly so your dog will succeed.
It’s important to always return to your dog to reward and release him. You want the stay to be rock solid. If you start calling your dog to you from the stay, he may start breaking the stay in anticipation of the joy of running to you-and the reward that ends the stay. If he thinks the stay is never over until you return to him, the behavior will become reliable.
Only in higher training levels do you occasionally call him from a stay. Even then, you will want to return and release 10 times for every one time you call him to you.
Final Step-Combine elements
Once your dog will stay at a distance, you can combine all of the elements. Again, lower the bar by adding distractions when you are one step, then three steps, then five steps away from your dog, always returning to him to reward and release.
At this point you can even start leaving the room while he is on a stay, briefly at first. Take one step out, step back in, return, reward, release. Gradually increase the length of time you stay out of sight. You can set up a mirror in the doorway if you want to keep an eye on your dog , always remembering that you want to return to him before he moves out of his stay position.
Again, you want him to succeed. If he makes several mistakes in a row and you return each time to try again, he is learning that the mistake of breaking the stay makes you return to the room. Anytime he starts making mistakes, return to an easier version of the exercise and get several successes in a row before you raise the bar again.
Whether your goal is to get your dog to park himself on a down/stay while you fetch the paper, or you have visions of you and your dog earning a perfect 200 score together in the obedience ring, you can get there in a positive, fun way-with no harsh words, no excessively harsh collar corrections, and no damage to the relationship of trust and respect that you and your dog value so highly.
The Whole Dog Journal
Elle Harris


